树莓派基础知识捣鼓
安装
在Raspberry官网下载树莓派系统
检查sha256sum
(base) ➜  Softwares git:(master) ✗ sha256sum 2020-02-13-raspbian-buster-full.zip
c9c382b659bd96b859ccb9e2ac0c2292a91a37c286ab464f2f380d451077663d  2020-02-13-raspbian-buster-full.zip
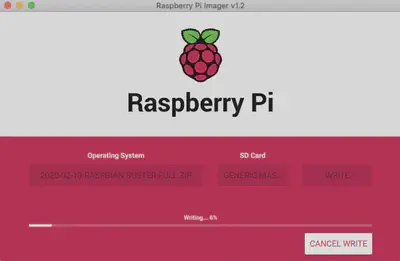
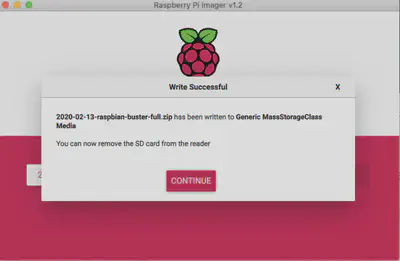
准备sd卡,根据你的操作系统在Raspberry官网下载Imager,用于向树莓派烧写系统。(需注意,烧写系统的之前会将SD卡格式化)


https://projects.raspberrypi.org/en/projects/raspberry-pi-setting-up/2
Mac第一次连接树莓派
串口
初始用户名pi,初始密码raspberry
(base) ➜  boot arp -a
? (192.168.2.2) at dc:a6:32:61:c:92 on bridge100 ifscope [bridge]
? (192.168.124.1) at 78:2c:29:e3:59:2b on en0 ifscope [ethernet]
? (192.168.124.12) at 9c:e3:3f:45:43:e7 on en0 ifscope [ethernet]
? (192.168.124.14) at 8:e6:89:7c:d8:49 on en0 ifscope [ethernet]
? (224.0.0.251) at 1:0:5e:0:0:fb on en0 ifscope permanent [ethernet]
arp -a
ssh pi@192.168.124.14
ssh pi@192.168.2.2
配置无线网络
sudo iwlist wlan0 scan
wlan0     Interface doesn't support scanning : Network is down
缺少了什么接口?
通过vnc远程连接树莓派
要通过vnc连接树莓派需要先在树莓派上安装vnc服务器,配置好密码(给客户端连接用),做好了这些准备后客户端就可通过ip+端口+用户名+密码进行访问树莓派的桌面了,也可以作特殊设置,允许某些用户只能观摩而不得操作。
- 在树莓派上安装vncserver服务器
$ sudo apt-get install tightvncserver
- 编辑vnc配置文件
$ sudo nano /etc/init.d/tightvncserver
#!/bin/sh
### BEGIN INIT INFO
# Provides:          tightvncserver
# Required-Start:    $local_fs
# Required-Stop:     $local_fs
# Default-Start:     2 3 4 5
# Default-Stop:      0 1 6
# Short-Description: Start/stop tightvncserver
### END INIT INFO

# More details see:
# http://www.penguintutor.com/linux/tightvnc

### Customize this entry
# Set the USER variable to the name of the user to start tightvncserver under
export USER='pi'
### End customization required

eval cd ~$USER
case "$1" in
  start)
    # 启动命令行。此处自定义分辨率、控制台号码或其它参数。
    su $USER -c '/usr/bin/tightvncserver -depth 16 -geometry 800x600 :1'
    echo "Starting TightVNC server for $USER "
    ;;
  stop)
    # 终止命令行。此处控制台号码与启动一致。
    su $USER -c '/usr/bin/tightvncserver -kill :1'
    echo "Tightvncserver stopped"
    ;;
  *)
    echo "Usage: /etc/init.d/tightvncserver {start|stop}"
    exit 1
    ;;
esac
exit 0
- 给tightvncserver添加权限
sudo chmod 755 /etc/init.d/tightvncserver
- 更新开机启动列表,使得树莓派开机自动启动vnc服务
sudo update-rc.d tightvncserver defaults
- 设置显示分辨率(否则可能会遇到vnc refused的情况)
$ vncserver -geometry 1422x800
You will require a password to access your desktops.

Password: coolcats_test
Verify: coolcats_test
Would you like to enter a view-only password (y/n)? y
Password: coolcats_test
Verify: coolcats_test
xauth:  file /home/pi/.Xauthority does not exist

New 'X' desktop is raspberrypi:1

Creating default startup script /home/pi/.vnc/xstartup
Starting applications specified in /home/pi/.vnc/xstartup
Log file is /home/pi/.vnc/raspberrypi:1.log
连接上vnc后,在里面连接wifi,成功后会在配置文件/etc/wpa_supplicant/wpa_supplicant.conf中写入wifi认证信息,以后重启时会自动尝试连接。写入wifi信息形式如下:
ctrl_interface=DIR=/var/run/wpa_supplicant GROUP=netdev
update_config=1
country=CN

network={
    ssid="network_name"
    psk="network_password"
    key_mgmt=WPA-PSK
}

network={
    ssid="network_name"
    psk="network_password"
    key_mgmt=WPA-PSK
    disabled=1
}
思考:可否通过串口/USB/Type-C等共享网络?可否使用mac作为树莓派的屏幕(不采用vnc等工具)?如何解决无法扫描wlan的问题?
提醒:第一次启动后记得改密码
串口工具 screen、coolterm、minicom
参考教程:
Mac网线连接树莓派,并设置树莓派自动连接wifi:https://blog.csdn.net/marvin_huoshan/article/details/79433661
树莓派的系统安装,并且利用网线直连 Mac 进行配置:https://www.cnblogs.com/zhenqichai/p/download-and-configure-raspbian-with-mac.html
Setting up the Raspberry Pi for programming from Mac OS X:http://www.pieter-jan.com/node/4
Start up your Raspberry Pi:https://projects.raspberrypi.org/en/projects/raspberry-pi-setting-up/4
树莓派配置数据科学开发环境
Anaconda、Jupyter环境等
树莓派是ARM指令集,有人提供了Miniconda的arm版。示例按照方法如下:
wget http://repo.continuum.io/miniconda/Miniconda3-latest-Linux-armv7l.sh
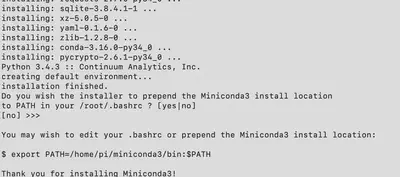
sudo bash Miniconda3-latest-Linux-armv7l.sh
安装时默认会安装到/root/miniconda3目录下,为了使用方便,最好将其安装到用户目录下。配置环境变量
export PATH="/home/pi/miniconda3/bin:$PATH"
source ~/.bashrc

创建虚拟环境
$ conda create -n networkit python=3
$ source activate networkit